close
Choose Your Site
Global
Social Media

Views: 0 Author: Site Editor Publish Time: 2026-05-18 Origin: Site
Layout errors cost construction professionals heavily every day. Material waste and alignment rework destroy project margins rapidly. Delayed timelines frustrate clients and ruin professional reputations. Traditional cross-line levels often fall short during complex room layouts. We see a massive shift toward advanced multi-plane tools across job sites today. This introduces a core debate for modern builders and renovators. Should you stick to a standard 3D layout tool? Or do you need the newer, often misunderstood 4D laser level? Understanding this difference prevents you from buying the wrong capability. We provide an evidence-backed, feature-to-outcome comparison below. You will learn how to evaluate these optical tools accurately. This guide helps contractors and serious DIYers decide easily. We show you exactly where upgrading yields a tangible return on investment. You will master the technical nuances distinguishing these layout devices.
3D laser levels project three 360-degree planes (12 lines), sufficient for framing, cabinetry, and drop ceilings.
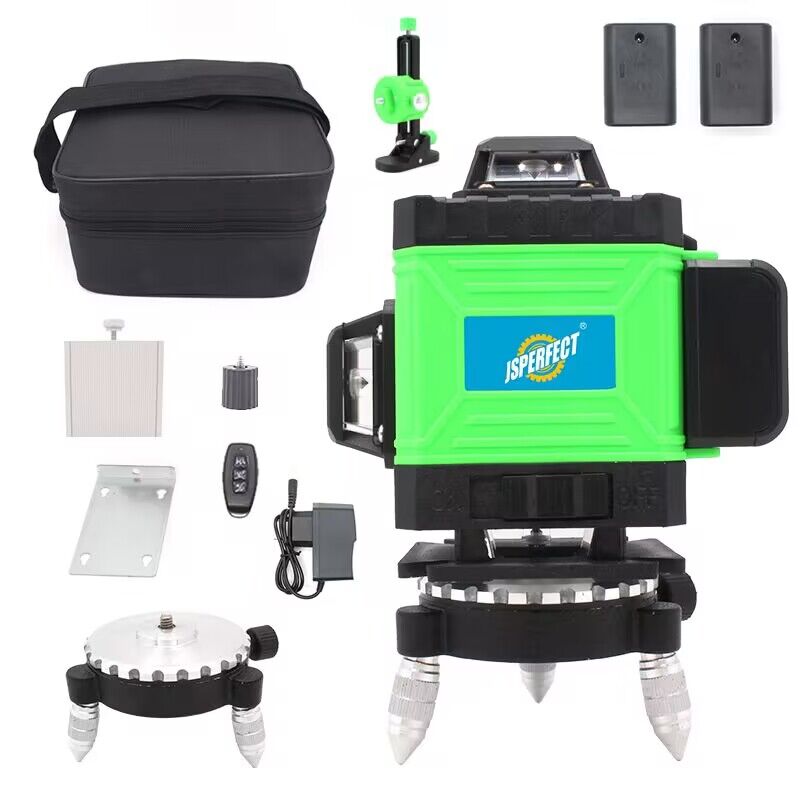
A 4D laser level projects four 360-degree planes (16 lines), specifically adding a low-clearance horizontal line dedicated to floor work.
The "4D" terminology refers to a fourth physical projection plane, not a sci-fi concept—eliminating the 5-to-6-inch floor gap typical in 3D models.
Upgrading to 4D is a highly justifiable expense for flooring, tiling, and baseboard professionals, while 3D remains the baseline for general carpentry.
How do these tools actually project accurate lines across large spaces? They transition far beyond traditional single-face projection methods. Older tools emit a basic 90-degree crosshair directly onto one wall. You must constantly rotate them to mark different surfaces. Modern multi-plane devices cast a 360-degree cross-matrix coverage instead. They map an entire room simultaneously. You gain a full visual grid instantly. You never need to move the unit during layout tasks.
Optical prism mechanisms make this continuous projection possible. Manufacturers shifted away from basic point diodes used in older models. Premium devices now utilize specialized cone and cylindrical glass prisms. These polished glass cones catch the raw diode beam internally. They spread the light outward into a uniform 360-degree halo. This optical scattering allows the beam to skim closely along adjacent surfaces. You get perfectly parallel reference lines across your entire workspace.
Compensator systems serve as the accuracy engines inside these devices. They guarantee the projected lasers remain perfectly straight. A slight table bump ruins your layout unless a compensator corrects the error. Two main systems dominate the professional market today:
Magnetic Pendulum Systems: These represent the industry standard for gravity-fed self-leveling. A pendulum hangs inside the optical housing. Gravity pulls it downward constantly. Small magnets located near the base create electrical resistance. This dampens the swinging motion rapidly. The lasers stabilize in mere seconds.
Electronic Step Motor Servos: High-end models abandon hanging pendulums completely. They use electronic tilt sensors paired alongside micro-motors. The motors physically adjust the internal housing automatically upon detecting a tilt. These advanced setups offer much tighter accuracy tolerances. You can achieve precision up to 0.1mm/m. Large-scale commercial sites demand this precision for structural alignments.
Let us examine the physical configurations separating these tools. The primary difference lies directly in the number of projection planes. Each plane consists of four lines forming a complete circle. This dictates how much of the room you can map at once.
The 3D (12-Line) Configuration gives you three 360-degree planes. It projects two vertical planes intersecting at perfect right angles. It also projects one horizontal plane. They intersect to create a full 3D reference grid. You can square walls and plumb doorways easily. However, this configuration holds a distinct physical limitation. The horizontal beam emits from the upper housing of the device. This physical design creates a blind spot near the floor. You typically face a vertical gap spanning several inches.
The 4D (16-Line) Configuration solves this exact bottom-clearance problem entirely. It projects two vertical planes and two horizontal planes. The crucial addition is a secondary horizontal laser. Manufacturers position this extra beam at the extreme base of the unit. They invert the optical prism to shoot light downward. The outcome changes everything for floor workers. It allows simultaneous top-and-bottom alignment instantly. Multiple contractors can execute different tasks simultaneously. You can install a drop ceiling while a colleague tiles the floor below. Moving the unit becomes unnecessary.
Technical Specification | 3D (12-Line) Models | 4D (16-Line) Models |
|---|---|---|
Total Projection Planes | 3 (2 Vertical, 1 Horizontal) | 4 (2 Vertical, 2 Horizontal) |
Total Laser Lines | 12 Intersecting Lines | 16 Intersecting Lines |
Floor Clearance Gap | Typically 5 to 6 inches off the ground | Near-flush (under 1 inch from the floor) |
Primary Trade Benefit | General framing and ceiling installers | Flooring, tiling, and masonry professionals |
If your daily workflow heavily involves ground-level precision, upgrading makes financial sense. Investing in a reliable 4D Laser Level eliminates the need for manual floor offsets completely.
Many buyers express deep skepticism regarding the "4D" label. Major legacy brands haven't universally adopted this naming convention yet. You might wonder if it is merely a marketing trick. Online marketplaces feature countless tools claiming fourth-dimensional capabilities. Let us clarify the physical reality behind the controversial name.
The term strictly implies a fourth dimensional projection plane. It does not refer to a scientific breakthrough in theoretical physics. You are buying a fourth physical beam. It adds a bottom horizontal line wrapping around the room. The "D" stands for dimension in a geometric sense regarding the mapped planes.
The clear-cut advantage becomes obvious immediately on the job site. Traditional 3D models feature a thick, bulky base. This plastic casing keeps the lowest horizontal line roughly five to six inches off the ground. You cannot use it to level floor tiles properly. You cannot align baseboards accurately without measuring down manually. The 16-line configuration uses an inverted bottom prism. It achieves a near-flush floor layout effortlessly. The laser beam hovers barely above the subfloor. This physical alteration solves a massive pain point for specific trades. You avoid relying on a tape measure for lower reference points.
Your daily tasks dictate the best tool for your toolbox. Paying for extra lines provides zero return on investment if you never use them. We break down the primary applications to help you choose wisely.
Framers and carpenters rarely need floor-skimming lasers. You will find a 12-line model perfect for standard vertical alignments. It handles installing drywall perfectly. Hanging upper cabinets and squaring wall tracks become seamless tasks. Aligning drop ceilings becomes incredibly fast. Utilizing multi-plane levels for ceiling grids reduces setup time significantly. You can slash layout time by up to 75% compared to manual string lines.
Floor workers face entirely different layout challenges. You need lasers positioned as close to the ground as possible. Floor tile layouts require precise grout line alignments. Baseboard installations demand level perimeters across wavy floors. Concrete slab leveling requires accurate elevation checks. The bottom-mounted beam creates a true zero-clearance reference point. You can lay mortar and place tiles directly along the glowing line. A highly accurate 4D Laser Level pays for itself on a single large commercial tile job.
Large commercial jobs demand extensive multi-contractor coordination. You might route commercial HVAC systems while masons build interior block walls. Cumulative errors over long building spans risk strict code compliance. Having top and bottom horizontal planes simultaneously keeps everyone aligned perfectly. Mechanical contractors can reference the upper beam for ductwork. Flooring contractors reference the lower beam for raised access floors. Nobody has to move the instrument and disrupt the existing layout.
Job Type | Recommended Tool | ROI Justification |
|---|---|---|
Drywall & Cabinetry | 3D (12-Line) | Sufficient multi-plane grid; minimizes unnecessary tool costs. |
Tiling & Baseboards | 4D (16-Line) | Eliminates manual tape offset measurements from high lines. |
HVAC & Ceiling Grids | 3D or 4D | 75% faster setup time versus manual water levels or strings. |
Commercial Concrete | 4D (16-Line) | Simultaneous reference points for formwork and slab finishing. |
Choosing the right model involves checking specific hardware specifications thoroughly. You must look beyond simple line counts to guarantee reliable site performance. Evaluate these four technical pillars carefully before purchasing.
Self-Leveling Tolerances: Check the internal pendulum's flexibility limits. Look for models boasting a ±3° to ±4° tilt tolerance. If you place the unit on a slightly uneven surface, it compensates automatically. The device flashes or beeps if the surface angle exceeds this range. Rapid settlement times also matter greatly. The beams should stop bouncing and lock into place in under 10 seconds.
Beam Color & Visibility: Laser diode color dictates outdoor and indoor performance.
Green Lasers: These push a much higher lumen output. They appear up to four times brighter to the human eye. They provide optimal visibility for long-range and bright indoor environments.
Red Lasers: These models cost less upfront. They consume significantly less battery power. You will find them suitable for smaller indoor DIY projects lacking intense sunlight.
Advanced Operation Modes: Professional jobs require versatile projection behavior.
Pulse Mode: This remains essential for outdoor work. Direct sunlight makes even bright green beams invisible. Pulse mode flashes the beam rapidly. It extends your working range by allowing compatibility with external laser receivers or detectors.
Slope/Tilt Mode: Sometimes you need an angled reference line. This mode locks the internal pendulum securely in place. You can tilt the unit safely for angled projections. It proves critical for aligning handrails, staircases, and vaulted ceilings.
Power Management: Multi-plane projection drains batteries incredibly quickly. Running 12 or 16 continuous lines requires serious energy capacity. Prioritize high-capacity lithium-ion battery setups. Avoid relying on standard alkaline AA battery systems. Lithium-ion packs offer full-shift reliability, often lasting 10 to 12 hours on a single charge.
Even premium tools fail if you mishandle them on site. Construction environments are inherently hostile to precision optical electronics. Follow these best practices to maintain your layout accuracy over time.
Pre-Project Calibration Checks
Never assume factory calibration survived the shipping process intact. Courier trucks endure massive vibrations daily. Validate the device accuracy upon receipt immediately. Test the vertical lines against a traditional mechanical plumb bob. Test the horizontal lines using a trusted spirit level or a clear water level. Doing this prevents you from framing an entire room crookedly.
Environmental Vulnerabilities
Job sites present harsh conditions for fragile optics. Extreme heat can degrade laser diodes and electronic compensators permanently. Do not leave the unit baking inside a hot truck cabin during summer. Direct UV exposure minimizes beam visibility during active use. Outdoor tasks often require careful shade planning. Use a reflective target plate to enhance visibility in bright conditions.
Hardware Maintenance
Dirt, drywall dust, and moisture destroy laser clarity quickly. Clean the glass cone prisms exclusively using lint-free microfiber cloths. Rough paper towels scratch the delicate optical coatings. Scratches cause beam scattering, making your lines thick and blurry. Finally, always engage the pendulum lock before transport. Leaving the pendulum swinging freely will destroy the internal suspension mechanism during transit.
We have explored the definitive differences separating these layout tools completely. The final verdict remains straightforward for buyers. Neither tool is inherently better than the other across all jobs. The choice relies entirely on the presence of floor-level tasks.
Apply a simple shortlisting logic before buying. If a contractor exclusively frames walls or installs ceiling hardware, a high-quality 3D unit maximizes your return on investment. If your scope routinely includes tiling, leveling subfloors, or running baseboards, upgrade immediately. The minimal price gap to jump to a 16-line unit pays for itself in reduced layout frustration.
Assess your primary project types thoroughly as your next step. Check battery capacity and assess accessory compatibility closely. Ensure your chosen model works seamlessly with your existing tripods and magnetic wall brackets. Taking these actions guarantees you purchase the perfect alignment tool for your trade.
A: It provides an additional 360-degree horizontal line positioned extremely close to the floor. This extra bottom-mounted beam eliminates the standard 5-inch vertical blind spot. It is perfect for tiling, leveling subfloors, and installing baseboards without requiring manual tape measurements.
A: They are only necessary if you run multi-plane layouts simultaneously. You need them if you require top and bottom horizontal references at the exact same time. This helps coordinate different trades working in one room without moving the layout equipment.
A: Yes, provided it features a high-visibility green beam and an integrated Pulse Mode. Direct sunlight washes out the naked beam easily. You must use it alongside an external outdoor laser detector to pick up the flashing signal accurately over long distances.
A: Most commercial-grade models maintain an exceptional accuracy of ±1/9 inch at 33 feet. They correct themselves automatically within a ±4° inclination range. The device will flash rapidly or emit an audible beep if the surface is too uneven to stabilize.