close
Choose Your Site
Global
Social Media

Views: 0 Author: Site Editor Publish Time: 2026-08-18 Origin: Site
The appeal of completing a 2,000-square-foot exterior paint job in a single afternoon is undeniable. When faced with massive walls, long fences, or intricate deck spindles, the physical toll of traditional rolling and brushing quickly becomes apparent. However, the reality of extensive masking and equipment setup often catches first-time users off guard. Buyers frequently struggle to determine if the time saved during paint application offsets the financial cost, steep learning curve, and significant cleanup time associated with high-pressure spray systems.
Moving past manufacturer claims of effortless painting requires an objective look at the actual field performance of these machines. To determine if an investment in spray equipment is justified, you must evaluate project thresholds, material efficiency, and implementation realities. Understanding these factors ensures you choose the right approach for your specific renovation or maintenance tasks, avoiding costly mistakes and wasted weekends.
Scale Dictates Value: Airless systems yield the highest ROI on large, continuous surfaces (exteriors, fences, empty interiors) where application speed outweighs prep time.
The Prep-to-Paint Ratio: Spraying requires meticulous masking; expect to spend 70-80% of project time on preparation and cleanup, and only 20-30% actively spraying.
Material Efficiency Trade-off: Airless sprayers waste roughly 20-40% of paint through overspray, increasing material costs despite reducing labor time.
No Thinning Required: Unlike HVLP systems, true airless sprayers can atomize heavy, unthinned latex paints and primers, ensuring a durable, factory-grade finish.
Airless technology operates by pumping paint at extremely high pressure, often reaching up to 3,000 PSI. This immense pressure forces the fluid through a narrow, precision-cut tip, atomizing the coating into a fine mist without the use of compressed air. This mechanical process shears the paint into tiny droplets, allowing for rapid, even coverage over broad architectural surfaces. The pump itself is usually driven by an electric motor, though gas-powered variants exist for remote exterior work.
The primary benefit of this high-pressure system is the ability to push heavy, viscous coatings directly from the bucket. Materials like exterior acrylic latex, block filler, elastomeric coatings, and heavy bonding primers can be applied without adding water or chemical thinners. This capability preserves the chemical integrity of the paint, ensuring maximum durability, proper adhesion, and full hide in fewer coats. When you thin a paint, you compromise its binding properties; airless systems bypass this problem entirely.
To understand the sequence of operation, consider the basic fluid path of an airless system:
The pickup tube draws raw paint directly from a one-gallon or five-gallon bucket.
The fluid passes through an inlet strainer to catch large debris and dried paint flakes.
The piston pump pressurizes the fluid, pushing it through the manifold filter for secondary debris removal.
The pressurized paint travels through a high-pressure hose to the spray gun.
Upon pulling the trigger, the fluid passes through a final gun filter and is forced through the spray tip orifice, atomizing instantly upon hitting the atmosphere.
When comparing airless to HVLP (High Volume Low Pressure) systems, the distinction lies in volume versus precision. HVLP is designed for fine-finish, detailed work such as custom cabinetry, interior trim, and furniture restoration. HVLP turbines use a high volume of warm air to gently push the paint, which almost always requires significant thinning to atomize properly. In contrast, airless systems prioritize sheer volume and speed, making them ideal for broad surfaces where you need to move gallons of material quickly.
Comparing airless application to traditional rolling highlights a massive trade-off between physical labor and setup overhead. Rolling induces significant physical fatigue, especially on the shoulders and back, and takes considerably longer on large areas. However, spraying demands extensive masking and equipment preparation before a single drop of paint hits the wall. If you are painting a single bedroom, the roller wins because the prep time for spraying would take longer than the entire rolling process.
Application Method | Best Use Case | Speed of Application | Prep & Cleanup Time | Material Waste |
|---|---|---|---|---|
Airless Sprayer | Exteriors, fences, empty houses | Extremely Fast | Very High | 20-40% (Overspray) |
HVLP Sprayer | Cabinets, furniture, detailed trim | Moderate | High | 10-20% |
Traditional Roller | Occupied rooms, small touch-ups | Slow | Low | Minimal (<5%) |
The efficiency of Airless Paint Sprayers becomes apparent once a project exceeds certain size thresholds. Generally, projects spanning 500 to 1,000 square feet or more justify the setup and cleanup time. A prime example is painting the entire interior of a newly constructed home before the floors, cabinets, and light fixtures are installed. In an empty shell, you can spray ceilings and walls with reckless abandon, covering thousands of square feet in a single day.
High-ROI projects for airless application include exterior siding, long perimeter fences, and exposed basement ceilings. Multi-room interior priming in empty spaces also benefits immensely from the rapid coverage rates. If you have a 200-foot run of shadowbox fencing, brushing and rolling will take days of agonizing labor to push paint into every overlapping board. An airless sprayer can coat that same fence in a few hours, pushing paint deep into the wood grain and tight corners.
Airless sprayers excel on uneven or highly textured surfaces where rollers fail to penetrate crevices. Materials like rough brick, heavy stucco, louvered doors, and beadboard are notoriously difficult to paint manually. A roller will simply bridge the gaps, leaving unpainted pockets that require tedious back-brushing. The pressurized mist from a sprayer easily coats deep recesses and irregular profiles, ensuring uniform coverage without the physical strain of forcing a brush into rough masonry.
Highly articulated outdoor structures present another ideal use case. Deck railings, stair balusters, and intricate lattices are agonizingly slow to brush. You spend hours chasing drips around the edges of square spindles. Spraying these complex geometries saves immense amounts of time and prevents the buildup of heavy brush marks common with manual application. The fluid wraps around the edges slightly, providing a much more uniform coat on multi-dimensional surfaces.
When equipped with the correct tip and operated with proper technique, airless sprayers can achieve a glass-like finish on broad surfaces. This method completely eliminates the stipple texture left by roller naps and the visible directional strokes left by synthetic brushes. For flat slab doors, wide baseboards, and smooth exterior cladding, the resulting factory-grade finish is often superior to what can be achieved by hand.
Achieving this finish requires understanding the relationship between pressure and fluid dynamics. If the pressure is too low, the paint will not atomize fully, leaving a textured, spit-like finish. If the pressure is too high, you risk excessive overspray and premature wear on the pump packings. Finding the sweet spot allows the paint to lay down wet and level out perfectly before drying.
Rigorous masking is an absolute necessity when operating high-pressure spray equipment. Atomized paint dust is incredibly lightweight and will remain suspended in the air before settling on any uncovered surface within the vicinity. Windows, floors, landscaping, concrete walkways, and adjacent structures must be completely sealed off before spraying begins. You cannot simply throw a canvas drop cloth over a sofa and start spraying; the airborne particles will find their way underneath.
The cost of masking materials must be factored into the overall project budget. High-quality painter's tape, static-cling plastic sheeting, masking paper, and heavy-duty drop cloths add up quickly. Often, the time and financial investment in preparation far exceed the actual time spent applying the paint. A professional crew might spend three days masking a house exterior and only one day actually spraying the siding.
Clean all surfaces to ensure masking tape adheres properly.
Apply tape and masking paper around all window frames and door jambs.
Drape static-cling plastic over the glass and secure the edges.
Cover all concrete, decking, and landscaping with canvas or heavy plastic drop cloths.
Seal any ventilation intakes to prevent paint dust from entering the HVAC system.
Transfer efficiency is a critical factor when evaluating material costs. Airless sprayers typically achieve a transfer efficiency of 50-70%, meaning a significant portion of the atomized paint never reaches the intended surface. This overspray is lost to the wind, bounces off the substrate, or lands on your masking materials. Wind conditions heavily impact exterior spraying; even a mild breeze can carry paint dust onto a neighbor's car.
To quantify this impact, consider a project that requires 10 gallons of premium exterior paint when applied via roller. Using an airless sprayer, the same project may require 13 to 14 gallons to account for overspray. This increased material consumption offsets some of the financial savings gained from reduced labor time. You must calculate the cost of the extra paint against the value of the hours saved.
Operating an airless sprayer requires specific physical techniques that take time to master. Users must maintain a consistent 12-inch distance from the surface and keep the gun perfectly perpendicular throughout the stroke. Arcing the gun at the end of a pass will result in heavy paint application in the middle and light application at the edges. Executing a 50% overlap on each pass is crucial to avoid runs, drips, and visible banding.
Real-time troubleshooting is another hurdle for beginners. Managing tip clogs mid-stroke requires quick action using the reversible tip feature. You must rotate the tip 180 degrees, pull the trigger into a waste bucket to clear the obstruction, rotate it back, and resume spraying. Additionally, operators must learn to set the correct pressure; too low, and the spray pattern will develop heavy edges known as "tails."
The high-pressure fluid stream generated by these machines poses severe safety risks that are often underestimated by DIY users. At pressures up to 3,000 PSI, the paint stream can easily pierce human skin, leading to injection injuries. These injuries might look like a simple pinprick initially, but the toxic paint is forced deep into the tissue, causing necrosis. These are severe medical emergencies that require immediate surgical intervention.
Always engage the trigger lock on the gun when you are not actively spraying. Never put your hand in front of the spray tip to test the pattern or attempt to wipe away a clog while the machine is pressurized. You must follow all pressure relief procedures—typically turning the prime valve to the open position and triggering the gun into a waste bucket—before servicing the equipment, changing tips, or cleaning the filters.
Post-project cleanup is a multi-step process that cannot be rushed or skipped. It involves flushing the pump with the appropriate solvent or water, cleaning the manifold filter, clearing the gun filter, and scrubbing the reversible tip with a nylon brush. Failure to thoroughly clean the system will result in dried paint ruining internal components, specifically the check valves and packings.
Long-term storage requires additional steps to protect the investment. After flushing the system clean, you must circulate pump armor or specialized storage fluid through the machine. This fluid prevents internal corrosion, keeps the packings lubricated, and stops the inlet and outlet valves from sticking together between uses. Proper maintenance ensures the sprayer primes instantly and functions correctly for the next project.
When purchasing, buyers face a choice between entry-level consumer models and prosumer or contractor-grade models. Budget DIY units can achieve a finish quality comparable to high-end professional rigs, making them attractive for occasional use. The pump mechanics are similar, and they use the same style of spray tips, meaning the paint hits the wall in much the same way.
However, entry-level models sacrifice durability and longevity. They have strict duty cycle limits, meaning they are rated for a limited number of gallons per year. Pushing a budget machine past its annual rating will quickly burn out the motor or destroy the packings. Furthermore, budget units often feature plastic housings and lack rebuildable fluid sections, limiting their long-term lifespan compared to contractor-grade machines designed with brass and stainless steel components for daily abuse.
Renting a commercial-grade airless sprayer often makes financial sense for one-off projects like painting a single exterior or staining a large deck. Renting provides access to high-performance, high-GPM equipment without the steep upfront purchase cost or the burden of long-term storage and maintenance. You get to use a machine that can support large tip sizes and long hose runs.
Renting does come with logistical risks. Rental yards impose strict cleaning fees if the unit is returned with dried paint in the lines or filters. There is also the potential for equipment wear from previous users affecting performance—such as worn tips that output a sloppy pattern. Finally, the pressure to finish the job within a tight rental window can lead to rushed prep work, resulting in overspray damage to surrounding areas.
Valuing personal time is a crucial part of the cost-benefit analysis. If a sprayer saves 30 hours of manual labor on a large deck or exterior siding project, calculate the monetary value of that saved time. Often, the labor savings alone justify the cost of purchasing or renting the equipment. If you value your weekend time, spending a few hours masking and spraying is vastly preferable to spending three consecutive weekends on a ladder with a brush and roller.
The Gallons Per Minute (GPM) rating is the most critical specification on an airless sprayer because it dictates the maximum tip size the machine can support. A higher GPM allows for larger orifices, which in turn enables the application of thicker coatings at a faster rate. If you try to use a large tip on a low-GPM machine, the pressure will drop, and the spray pattern will collapse. Maximum PSI ensures the machine has enough sheer power to properly atomize heavy, viscous paints without thinning.
Understanding the tip numbering system is essential for achieving good results. The three-digit number on a tip tells you exactly how it will perform. The first digit, when multiplied by two, gives you the fan width in inches when held 12 inches from the surface. The last two digits indicate the orifice size in thousandths of an inch. For example, a 515 tip produces a 10-inch fan width (5 x 2) and has a 0.015-inch orifice.
Tip Size | Fan Width | Orifice Size | Best Material / Application |
|---|---|---|---|
311 | 6 inches | 0.011 inches | Thin stains, clear coats, interior trim |
413 | 8 inches | 0.013 inches | Doors, cabinets, light latex |
515 | 10 inches | 0.015 inches | Standard interior/exterior latex paint |
517 | 10 inches | 0.017 inches | Heavy exterior latex, primers, block filler |
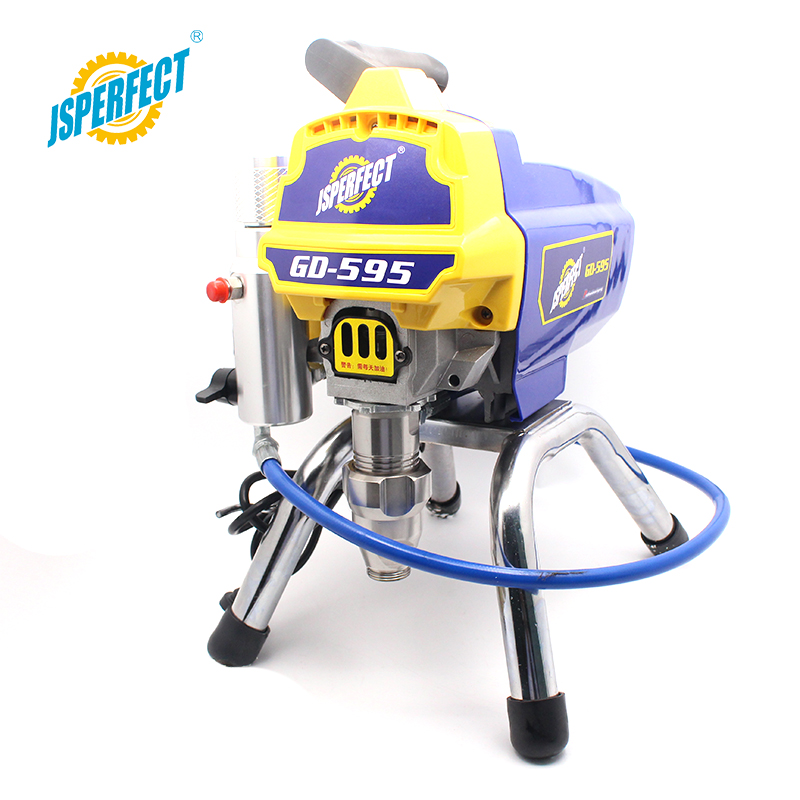
Stationary units that draw directly from 1-gallon or 5-gallon buckets offer significant operational advantages over handheld cup sprayers. These floor-standing or cart-mounted units typically support 25-to-50-foot high-pressure hoses. This allows the operator to move freely around the project site, climbing ladders and navigating scaffolding, while the heavy machine and paint bucket remain safely on the ground. This minimizes arm fatigue, as you are only holding the weight of the gun and a section of hose, rather than a heavy motor and a quart of paint.
Longer hoses also speed up the application process by reducing the number of times you need to stop, climb down, move the machine, and reposition the bucket. For exterior house painting, a 50-foot hose is generally considered the minimum requirement to work efficiently across a standard residential facade.
Calculate your project's total square footage to determine if the scale justifies the setup time.
Estimate the hours required for masking and prep work versus the time saved during application.
Review the GPM requirements for your chosen paint to ensure compatibility with the equipment.
Decide whether renting or buying aligns better with your long-term renovation plans.
A: Yes, they typically use 20-40% more paint. Airless sprayers have a transfer efficiency of 50-70%, meaning a significant portion of the atomized paint is lost as overspray or lands on masking materials, increasing overall material costs.
A: Yes, but it is best suited for empty rooms or new construction. Using them in furnished rooms requires extreme masking, as overspray drift will settle on everything. Proper ventilation is also critical when spraying indoors.
A: Generally, no. Most true airless systems generate enough pressure to atomize heavy, unthinned latex paints and primers. However, always check the paint manufacturer's Technical Data Sheet (TDS) for specific application guidelines.
A: A thorough cleaning typically takes 20 to 45 minutes. The process involves flushing the pump with solvent or water, cleaning the manifold and gun filters, and scrubbing the reversible tip to prevent dried paint from ruining the system.
A: Air-assisted airless sprayers use fluid pressure to atomize the paint initially, but add compressed air at the tip to refine the spray pattern. This technology is primarily used for high-end, fine-finish woodworking and cabinetry.
A: Budget models can deliver professional-looking finishes initially and are suitable for occasional DIY use. However, they feature more plastic internal components, have limited annual duty cycles, and lack rebuildable pumps, making them poor choices for frequent use.